
Trichome Lyophilization On Scale: For Harvest Right Models
Operating Harvest Right Lyophilization units for full-spectrum, High throughput operations to reduce consumables and downtime while increasing overall output.
By Justin Massie
What will we need?
Here are some items recommended for this Method:
-
Have twice as many trays as you do shelves.
-
An extra set of trays per drying unit.
-
An upright frost-free freezer with shelving.
-
A Nylon 2-inch & 4-inch paintbrush.
-
Stainless steel bowls.
-
A strainer to match the diameter of the stainless-steel bowl.
Is your unit updated? Before continuing, be sure to check that your unit is up to date with the latest software! At the time of writing the software is V.5.0.1.5p. This is a crucial aspect to follow this guide to be able to set your device accordingly. If not, request the files to the manufacturer. Load these files onto a reformatted USB making sure the unit is OFF. Place the USB into the port on the side of the digital display. Turn the unit on and wait. The program will upload quickly and will ask for the model of the vacuum pump being used. Select the appropriate pump and press OK.
With the unit up to date, set it to the following parameters:
Go to settings, and first switch the ‘dry’ option from ‘sense’ to ‘time’.
Set time to 24 hours for single-shift operations, and 12 hours for multiple shift operations.
Set freezing temperature to -30f and shelf temperature to 35f. One reason this update is important is the ability to control the wall temperature. By bringing this number as low as possible, we can have a lower shelf temperature to match. This keeps our product near or below freezing during the entire working process from start to finish!
Freezing time can be set to 1 hour or the length of your wash cycle.
Before the washing process starts, begin by placing the empty trays in the freezer. Pre-chilling the trays to -30f during the wash cycle will be a benefit to us later and will make our environment temperature much less of a factor in the working process.


As the wash completes and we fully rinsed the product, still in the bags, we have a moment to control how whetted our freshly collected hash is. This is one of the most understated aspects of Freeze-drying. A dry or poorly hydrated tray is not recommended! Aim for a thin pancake batter-like consistency.
Keeping this consistency is important for several reasons.
- Dry spots are not a positive thing to have in the trays as counterintuitive as this may be. We have consistently seen that the driest location of a poorly whetted tray takes the longest period to dry compared to the rest of the tray.
- An even layer is likely to create larger ice crystals! Smaller ice crystals take much longer to dry due to decreased surface area. Maximizing the evaporative surface of each ice crystal is important.
- It maximizes the surface area of your tray. Every square inch of metal showing in your trays when the drying process starts will translate to extra hours in the unit.
Keep a source of clean, cold water on hand to maintain the consistency described above.
It’s time to fill trays!
Select a container or vessel with an equal diameter to your collection bag and stretch the bag over the vessel, leaving a shallow dip to work out off. This stretching will pull excess water through the filter bag via vacuum. Adding some fresh water to the slurry is likely needed to keep the consistency. We can add ice underneath the bag to help deal with higher environmental temperatures.

Now that our hash is fluidized, the bag is stretched across our vessel. It’s time to load our trays!

Remove one pre-chilled tray from the upright freezer at a time, and place it on a surface at the same level as the height of your collection vessel. Working quickly, be sure to mix the slurry gently as you scoop it from the bag to the tray. If you are operating in a process that uses ‘Vibrational sieving’ I suggest holding the tray against the vibrating surface for a few seconds to help evenly disperse the product. If multiple trays are being filled per bag, do a bit more hydrating to account for water falling through the bag to maintain an even saturation from tray to tray.

Be sure not to fill each tray with more than half the height of the tray. Past this, point will reduce efficacy and require multiple drying cycles.

(Pictured: Freshly loaded trays with an even slurry.) Notice the lack of parchment paper. This is for a good reason. The amount of energy need to produce sublimation is minute. The heating element in the tray produces very little warmth, and we rely on the conductive nature of the steel trays to transfer that energy inside of our vacuum chamber. Parchment, an insulator, inhibits this and in the end only adds to our drying time as well as adds unneeded consumable materials. By simply allowing the trays to cool past the shelf temperature at the end of the run, the resin will not stick to the tray. A paint brush becomes a very efficient tool for removing any remaining heads.

Depending on the workflow needs of your operation, the number of freeze dry units available may not be enough, and in most labs, dryer space is a premium. To avoid this being a bottleneck, after collection I suggest bringing the tray back to the upright freezer for a long, gentle freezing. By avoiding the use of the freeze dryer to freeze the product, we get several advantages:
-
Reduction of the working time of the Unit per dry batch.
-
Batches can be stored frozen for months at a time without effecting the quality of the hash.
-
Smaller ice crystals formed have time to ‘anneal’ and grow larger and less dense, speeding up the actual time in the dryer.
-
We remove the product from the dryer on a predictable and reliable schedule, decreasing time to shelf and increasing employee productivity.
-
By working through frozen product in a rotational order, freezing times are eliminated from the schedule.
After the tray has been pre-frozen, The Harvest Right unit only requires about 15 minutes of refrigeration time to cool the walls of the vacuum chamber. Simply load the trays in after 15 minutes and press the harvest right leaf logo in the top left corner of the display.
This will force start the ‘vacuum freezing’ program. So long as the tray is properly frozen, there should be no issues. If you notice the hash is ‘rising’ during this program, cancel and allow the product to freeze more thoroughly.
With the trays evenly saturated with water frozen slowly to promote the formation of large ice crystals and time to allow those crystals to lose as much density as possible, dry times should be reduced to 12-16 hours consistently allowing for more cycles per work week.
As the cycle is complete, open the dryer and check each tray for ice. We do this by running a dull blade vertically down the trays. If no ice is found, place the trays back in the dryer momentarily. If the cycle has just recently finished, this allows the plates to return to below freezing temperatures, along with the hash.
On a large flat surface, set up your steel bowls, brushes, sieves and final container.
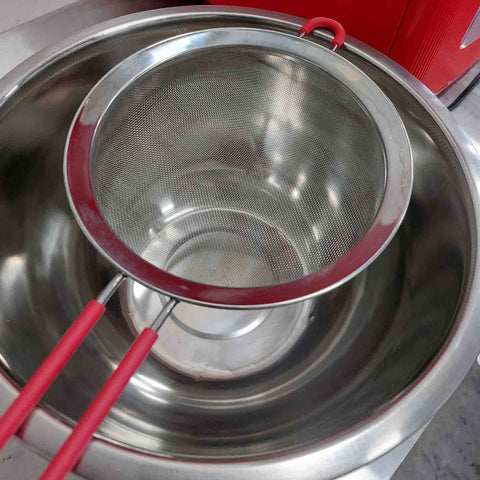
Set up the strainer across the bowl. Removing one tray at a time from the drying unit and using the 2-inch nylon brush, gently slide the contents into the sieve. Use the 4-inch brush to remove any remaining heads into the sieve. Gently shake the sieve back and forth, allowing the heads to separate and fall through into the stainless-steel bowl for quality and weight checks.
Once each dry tray has been removed from the dryer, if necessary, initiate a defrosting cycle.
To hasten the defrosting process, I physically remove large sheets of ice by hand. This can bring an hour to 2-hour long process to a 20–45-minute process. After the ice has been removed, seal the dryer, and complete the program to return to the starting screen. Press the logo on the top left-hand corner to enter the analog testing screen. This screen will have on/off options for–tray heater-refrigeration-vacuum-. Start the refrigeration first, wait a moment or two for the temperature to go down and then start vacuum. The unit will soon be chilled again, free of ice and ready to use in a shorter period than using the general defrosting program.
At this point, we can take the product to processing via "static tech” and/or prepared for Rosin extraction.

(photo credits: Justin Massie 2022, Freshly sifted heads from freeze dryer)
If done correctly, a day of using this method will look something like this:
- Unload complete dryer cycle, while washing preparations begin.
- Defrost freeze-dryer, if necessary. (If so, defrosting can be finished before the first wash soaking period is finished.)
- Upon finishing defrost, seal the unit, and start a forced vacuum freezing to quickly cool the unit from defrosting temperatures.
- When unit is cooled to -30f, cancel program, break vacuum and load pre-frozen trays from a prior wash.
- Once again, force start the vacuum freezing process, then to final dry for either 12 or 24 hours, ideally lining up with the start of the day's first washing cycle.
- Post-wash rinsing & overnight freezing.
- Clean up